Key takeaways
- Table of Contents 7 sections 7 min read 1 What RAM overclocking actually changes 2 Choose a sensible starting point 2.1 Use the advertised profile first 3 Change settings gradually 3.1 Frequency before timings 3.2 Watch temperatures and symptoms 4…
What's inside
To learn how to choose to overclock RAM safely, start with your memory kit’s advertised profile, enable XMP or EXPO, and change only one setting at a time. For a manual overclock, use small frequency increases, keep DRAM voltage within a sensible daily range, preserve reasonable temperatures, and run several hours of memory testing before treating the result as stable. If your system becomes unreliable, return to the last stable profile or buy a faster, officially supported kit instead.
What RAM overclocking actually changes
RAM overclocking raises memory performance beyond the default JEDEC specification. The main controls are frequency, primary timings, memory voltage, and sometimes the memory-controller voltage. Higher frequency can improve bandwidth, while tighter timings reduce latency. Neither automatically produces a large gaming improvement: frame-rate gains are usually modest unless the game is CPU-limited or the original memory is particularly slow.
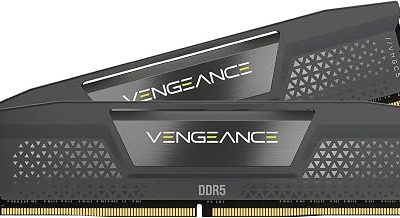
Modern memory kits often include a tested overclocking profile. Intel systems generally call this XMP, while AMD systems commonly use EXPO on compatible DDR5 platforms. Enabling one of these profiles is technically overclocking, but it is usually safer than inventing settings manually because the manufacturer has paired the advertised speed, timings, and voltage.
Check whether your system uses DDR4 or DDR5 before changing anything. The modules are physically different and cannot be substituted. Also confirm the motherboard’s memory support list, the processor’s memory-controller capabilities, and whether all installed modules are from a matched kit. Mixing two separate kits can work, but it makes stability less predictable.
Choose a sensible starting point
Use the advertised profile first
Enter the UEFI or BIOS by pressing the board’s setup key during startup, commonly Delete or F2. Find the memory or overclocking page and select the profile labeled XMP, EXPO, or an equivalent memory profile. Save and boot into the operating system. Do not immediately change multiple voltages or timings.
Before making a manual adjustment, record the original settings. Take a photograph of the BIOS page or write down frequency, CAS latency, tRCD, tRP, tRAS, DRAM voltage, and any memory-controller voltage. This makes recovery easier if the computer fails to boot.
| Memory class | Common starting profile | Typical DRAM voltage | Practical beginner target |
|---|---|---|---|
| DDR4 mainstream | 3200 MT/s, CL16 | 1.35 V | 3466–3600 MT/s |
| DDR4 performance | 3600 MT/s, CL16–18 | 1.35 V | 3600–3800 MT/s |
| DDR5 mainstream | 5600–6000 MT/s, CL36–40 | 1.25–1.35 V | 6000–6400 MT/s |
| DDR5 performance | 6000–7200 MT/s, CL30–36 | 1.35–1.45 V | Profile speed first |
These are starting ranges, not guarantees. A motherboard with two memory slots may overclock farther than a four-slot board, and two single-rank modules are often easier to run quickly than four modules. Capacity also matters: 2 x 16 GB is generally simpler than 4 x 16 GB, while 2 x 32 GB can place more strain on the memory controller.
Change settings gradually
Frequency before timings
For a manual attempt, leave the advertised primary timings in place and raise frequency in small steps. On DDR5, try increments of 200 MT/s; on DDR4, use steps of 100 or 200 MT/s. Boot and perform a short stability check after each change. If the system fails to start, clear the CMOS or use the motherboard’s memory-recovery process, then return to the last working setting.
Keep DRAM voltage conservative. For many daily DDR4 configurations, 1.35 V is normal and around 1.40–1.45 V may be used by enthusiast kits, but more voltage increases heat and long-term stress. For DDR5, 1.25–1.35 V is common, with some performance kits rated around 1.40–1.45 V. Treat the kit’s label and manufacturer specifications as the upper reference, not an invitation to keep increasing voltage.
Avoid changing memory-controller or system-agent voltages unless you understand the platform-specific terminology. Excessive controller voltage can create heat and degradation even when the memory modules themselves remain cool. Leave secondary and tertiary timings on Auto at first. If the computer cannot train memory reliably, reducing frequency is usually safer than adding large voltage increases.
Watch temperatures and symptoms
Install a hardware-monitoring utility that can report memory-module temperature when the modules provide a sensor. Sustained memory temperatures below approximately 50–60°C are a comfortable target for many desktop systems, although the manufacturer’s rating takes priority. Improve case airflow if temperatures rise sharply during our research.
Instability does not always produce an obvious crash. Watch for application errors, corrupted archives, blue screens, game exits, unexplained reboots, file-system warnings, and failed operating-system updates. A system that boots Windows is not necessarily stable.
Stress-test every change
Use layered testing
Start with a quick check after each adjustment. Run a memory-focused test such as MemTest86 from a bootable USB drive, or use a reputable Windows memory tester. A modern memory stress utility that loads both RAM and the memory controller can find errors faster, but it should not be the only test.
For a preliminary result, complete at least one full pass of a bootable memory test or about 30–60 minutes of an intensive desktop test. For a setting you intend to use every day, run several passes or multiple hours. Then use demanding real workloads: a long game session, a large file compression task, video rendering, or a compile workload. Different tests expose different weaknesses.
One error is enough to reject the setting. Do not “fix” errors by ignoring them or assuming they came from the test program. First return to the previous stable profile. If you want to continue, reduce frequency, relax timings, or make a small voltage adjustment within the kit’s rated range. After any change, repeat the full validation process.
Keep recovery simple
Enable the motherboard’s memory-failure recovery if available, and know where the clear-CMOS pins or button are located. Save a known-good BIOS profile before experimenting. Keep important files backed up because unstable memory can corrupt data, not just crash games.
When an alternative is better
Manual tuning is not always the best use of time. If your current kit already runs at 6000 MT/s with good timings on DDR5, the extra performance from 6200 or 6400 MT/s may be difficult to notice. A stable profile with lower latency is often preferable to a higher headline frequency that requires repeated troubleshooting.
Buying a matched kit is the simplest alternative when you have mixed modules, four occupied slots, insufficient capacity, or an older kit that cannot reach your platform’s recommended speed. A 32 GB kit, typically 2 x 16 GB, often costs about $60–$110 for mainstream DDR4 or $85–$150 for mainstream DDR5, depending on speed and timings. A 64 GB DDR5 kit, usually 2 x 32 GB, commonly costs about $150–$260. Prices vary by region and capacity.
Also consider upgrading capacity instead of frequency. Moving from 16 GB to 32 GB can eliminate paging and improve smoothness far more than a small memory-speed increase. For content creation, virtual machines, modded games, and modern multitasking, 64 GB may be a better investment than premium low-latency modules.
FAQ
Is enabling XMP or EXPO safe for everyday use?
It is generally the safest overclocking option because it applies the memory manufacturer’s tested frequency, timings, and voltage. However, compatibility is not guaranteed on every processor and motherboard. Confirm stability with memory testing, keep the profile’s voltage within its stated specification, and disable it if you experience errors or unexplained crashes.
What should I do if the computer will not boot after a RAM change?
Wait through one or two automatic memory-training attempts, then power down if it remains stuck. Use the motherboard’s recovery feature or clear the CMOS according to its manual. Load BIOS defaults, boot successfully, and re-enable only the last known-good profile. If necessary, install one module in the board’s recommended slot and test modules individually.
Bottom line
The safest path is to enable a rated XMP or EXPO profile, test it, and stop when performance is stable. If you pursue manual tuning, change frequency in small steps, keep timings and voltage conservative, monitor temperatures, and reject any setting that produces even one memory error. When the gain is small or the platform is difficult to stabilize, a matched higher-capacity kit is usually the smarter alternative.