Key takeaways
- Using the Wrong Lubricant: Never use WD-40, cooking oils, or petroleum-based lubricants like Vaseline. Petroleum dissolves plastic over time, which will ruin your pivot and joystick housing. Stick exclusively to 100% silicone grease.
- Over-Lubricating: More grease does not mean smoother movement. Excess grease acts as a magnet for hair, dust, and debris, turning into an abrasive paste that grinds down your hardware.
- Losing the E-Clip: The E-clip is under spring tension. If you pry it off without holding it down, it can fly off and become lost in your carpet. Always keep a finger over the clip during removal.
- Overtightening the Case Screws: Most arcade stick bodies are made of plastic or thin wood. Overtightening the bottom plate screws can strip the screw holes, making future maintenance difficult.
For fighting game enthusiasts and arcade purists, the arcade stick is more than a controller—it is a precision instrument. At the heart of this instrument lies the joystick assembly, specifically the pivot and the tension spring. These components dictate how smoothly your stick rotates and how quickly it snaps back to the neutral position.
If maintenance is neglected or performed incorrectly, the consequences are immediate and frustrating. You will experience a sluggish return-to-center, grinding sensations during quarter-circle inputs, and erratic move executions. Over time, running a dry pivot causes friction that permanently wears down the plastic housing, requiring a complete replacement of the joystick assembly. As we look at the landscape of gaming hardware in 2026, keeping classic arcade tech running smoothly remains an art form. Fortunately, learning how to maintain arcade stick joystick pivot and spring components is a straightforward process that takes less than an hour and preserves your controller for millions of inputs.
As an Amazon Associate we earn from qualifying purchases at no extra cost to you. Product prices and availability are accurate as of the date shown and are subject to change.

What You Need
Before cracking open your arcade stick case, gather the correct tools and replacement parts. Using the wrong lubricant or makeshift tools can permanently damage the delicate plastic and metal components inside your controller.
| Item | Why You Need It | Optional? |
|---|---|---|
| Silicone Grease | Lubricates the plastic-on-plastic pivot. Use Shin-Etsu G-40M or Molykote G-807 ($8.00 – $15.00). | No |
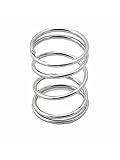
| Replacement Springs | Restores or customizes stick tension. Options include the Auto-plaza 8pcs 2lb/4lb Springs ($9.99) or SZJLMKJ 4pcs 4lb Springs ($11.99). | Yes (Only if upgrading/replacing worn springs) |
| Screwdrivers | Phillips #1 and #2 for the case and mounting plate; flathead for the shaft bottom ($5.00 – $10.00). | No |
| Needle-Nose Pliers | For safely removing and reinstalling the metal E-clip ($6.00 – $12.00). | No |
| Isopropyl Alcohol (90%+) | Cleans away old, dirty grease and dust buildup ($3.00 – $5.00). | No |
| Microfiber Cloth & Cotton Swabs | Applies alcohol and wipes away debris without leaving lint ($2.00 – $4.00). | No |
Step-by-Step
Set aside a clean, well-lit workspace. Keep a small cup nearby to hold tiny screws and the easily-lost E-clip.
Step 1: Open the Case and Access the Joystick (Time: 10 minutes)
Disconnect your arcade stick from any console or PC. Place the controller face down on a soft towel to prevent scratching the top plexiglass or artwork. Use your Phillips screwdriver to remove the bottom metal plate screws (typically 6 to 8 screws). Once inside, locate the bottom of the joystick shaft. Insert a flathead screwdriver into the slot at the base of the shaft to keep it from spinning, then unscrew the balltop or battop counter-clockwise from the top of the controller. Slide off the dust washers.
Step 2: Remove the E-Clip and Actuator (Time: 5 minutes)
Locate the small, metallic E-clip at the very bottom of the joystick shaft. This clip holds the entire spring assembly together. Place your thumb over the E-clip to prevent it from flying across the room, and use your needle-nose pliers to gently pry it off. Once the E-clip is removed, slide off the plastic actuator, the spring base, and the tension spring itself. Keep these parts organized in the order they were removed.
Step 3: Extract and Clean the Pivot (Time: 10 minutes)
With the spring assembly removed, push the metal joystick shaft upward and out through the top of the housing. This will release the cylindrical plastic pivot. Dip a cotton swab or microfiber cloth into the isopropyl alcohol and thoroughly clean the pivot, the pivot cup inside the joystick housing, and the metal shaft. Ensure all gray, gummy, or dirty old grease is completely removed. Let the components air dry for two minutes.
Step 4: Lubricate the Pivot Cup (Time: 5 minutes)
Take your specialized silicone grease (do not use petroleum jelly or WD-40). Squeeze out a portion roughly the size of a grain of rice. Using a clean cotton swab or your finger, apply a thin, even coat of grease to the outer curved surface of the plastic pivot and the inside of the housing’s pivot cup. The goal is a light, glossy sheen. Excess grease will only attract dust and migrate into the microswitches, causing input failures.
Step 5: Select and Install the Spring (Time: 5 minutes)
Inspect your spring. If your joystick feels loose or fails to snap back quickly, it is time to replace it. You can stick with a stock tension (typically 0.9lb) or upgrade. For a medium-firm feel, install a 2lb spring from the Auto-plaza 8-piece kit ($9.99). If you prefer a highly resistant, snappy stick that eliminates accidental inputs, opt for a 4lb spring, such as those found in the SZJLMKJ 4-piece set ($11.99). Slide the joystick shaft back through the housing, slide the pivot into place, and then slide on the spring base, your chosen spring, and the actuator.
Step 6: Secure the E-Clip and Reassemble (Time: 10 minutes)
Compress the spring by pushing down on the actuator. While holding the spring compressed, use your needle-nose pliers to snap the E-clip back into the groove at the bottom of the metal shaft. Ensure it clicks securely into place. Reattach the dust washers and screw the balltop back onto the top of the shaft, using the flathead screwdriver at the bottom to tighten it. Screw the bottom plate back onto the case.
Mistakes to Avoid
- Using the Wrong Lubricant: Never use WD-40, cooking oils, or petroleum-based lubricants like Vaseline. Petroleum dissolves plastic over time, which will ruin your pivot and joystick housing. Stick exclusively to 100% silicone grease.
- Over-Lubricating: More grease does not mean smoother movement. Excess grease acts as a magnet for hair, dust, and debris, turning into an abrasive paste that grinds down your hardware.
- Losing the E-Clip: The E-clip is under spring tension. If you pry it off without holding it down, it can fly off and become lost in your carpet. Always keep a finger over the clip during removal.
- Overtightening the Case Screws: Most arcade stick bodies are made of plastic or thin wood. Overtightening the bottom plate screws can strip the screw holes, making future maintenance difficult.
How Often
The frequency of your maintenance routine depends directly on your playtime and environment. Dust, pet dander, and humidity all accelerate the degradation of joystick grease.
- Casual Gamers (1–3 hours per week): Clean and re-lubricate the pivot once every 12 to 18 months. Springs rarely need replacement at this level of use.
- Enthusiasts & Active Players (5–10 hours per week): Perform maintenance every 6 months. Inspect the spring for compression loss and replace it if the stick feels soft.
- Tournament Competitors (15+ hours per week): Clean and re-grease the pivot every 3 months. Replace the tension spring every 6 to 9 months to maintain optimal muscle memory and snapback consistency.
When to Call a Pro or Replace
While maintaining a joystick is an easy DIY project, some wear and tear cannot be fixed with a simple clean-and-grease. If you notice deep, physical grooves carved into the plastic pivot or the inner cup of the housing, the plastic has worn away; lubrication will not restore a smooth feel, and you must replace the joystick core (ranging from $20.00 to $35.00 for a standard Sanwa JLF or Seimitsu LS-32 assembly).
Additionally, if you experience dead zones where inputs do not register even though the stick physically moves smoothly, the issue lies in the microswitches, not the pivot or spring. Microswitches are rated for millions of cycles, but they do eventually fail. If you are uncomfortable desoldering switches or replacing wiring harnesses, this is the time to purchase a drop-in replacement joystick assembly or consult a professional arcade tech cabinet builder.
FAQ
Can I use lithium grease instead of silicone grease?
White lithium grease is acceptable for metal-on-metal contacts, but it can degrade certain types of plastics over time. Because arcade stick pivots are almost exclusively made of plastic (such as POM/Delrin) riding inside a plastic housing, high-viscosity silicone grease is much safer and lasts significantly longer without drying out.
How do I know if I need a 2lb or a 4lb spring?
Stock arcade sticks come with a light 0.9lb spring, which some players find too loose. A 2lb spring offers a moderate increase in tension, providing a faster return-to-center without causing hand fatigue. A 4lb spring is very stiff, favored by players who want absolute precision and zero accidental inputs during high-stress matches. Kits like the Auto-plaza 8-piece set allow you to test both weights to find your preference.
My joystick is squeaking. Is that the spring or the pivot?
Squeaking is almost always caused by a dry pivot rubbing against the housing cup. However, a dry spring rubbing against the plastic spring base can also create a metallic clicking or squeaking noise. Applying a microscopic amount of silicone grease to the top and bottom coils of the spring where they contact the plastic base will resolve this instantly.
Do I need to grease the microswitches?
No. Microswitches are sealed components and should never be lubricated. Applying grease to the microswitches can seep inside the casings, coat the metal contacts, and prevent electrical signals from registering, rendering the switch useless.