Key takeaways
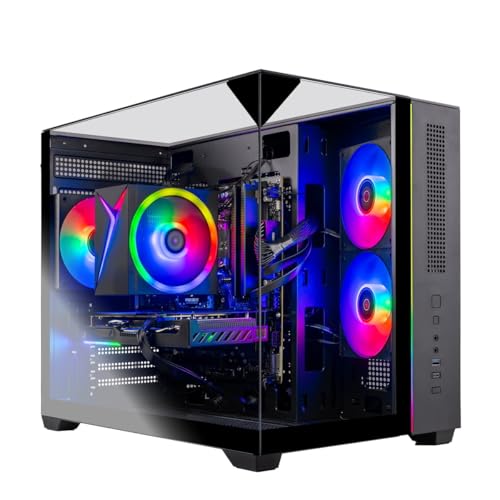
- A Windows PC (most retro systems run well on modest hardware; heavier systems such as the PlayStation 2 or GameCube need a more capable CPU and GPU).
- An emulator front end. RetroArch is a popular all-in-one option that runs many systems through plug-ins called cores. Standalone emulators for single systems are an alternative.
- Game files (often called ROMs or disc images) that you have the legal right to use, and system files (BIOS) where a console requires them.
- A controller that Windows recognizes, or a keyboard.
The simplest way to set up retro gaming on a PC is to install RetroArch, download a core for each console you want to play, point RetroArch at a folder holding games you legally own, add any required system files, then bind a controller. Everything runs on ordinary hardware for older consoles, and the steps below show the order that avoids most problems.
What you need
- A Windows PC (most retro systems run well on modest hardware; heavier systems such as the PlayStation 2 or GameCube need a more capable CPU and GPU).
- An emulator front end. RetroArch is a popular all-in-one option that runs many systems through plug-ins called cores. Standalone emulators for single systems are an alternative.
- Game files (often called ROMs or disc images) that you have the legal right to use, and system files (BIOS) where a console requires them.
- A controller that Windows recognizes, or a keyboard.
A note on legality
Emulators themselves are generally legal software. Copyright applies to the games and to console firmware. Downloading commercial games you do not own is infringement in many places. The safer path is to use your own dumps of games you own where the law in your country permits it, and to use freely distributed homebrew and public-domain titles. This article does not cover sources for copyrighted game files, and laws vary, so read your local rules.
Step 1: Install RetroArch
Libretro’s documentation advises downloading RetroArch from the project’s own site, picking either the stable release or a nightly build, and choosing an archive or an installer. It recommends extracting to a folder you can write to, such as one inside your user profile, rather than Program Files, which can cause permission issues for settings and saves. Stable releases are the sensible starting point for most people.
Step 2: Download cores
RetroArch needs a core for each system. Go to Online Updater, then Core Downloader, and choose cores from the list. The maker’s documentation describes this path. Core names and recommended picks vary by system, so read the matching page in the Libretro docs for the console you want. As a general guide:
| System | Typical core type | Notes |
|---|---|---|
| NES, SNES, Mega Drive | Light cores | Run on nearly any PC |
| Game Boy, GBA | Light cores | Some games need no extra files |
| PlayStation 1 | Mid-weight cores | Usually needs a BIOS for best compatibility |
| Dreamcast, N64 | More demanding cores | Setup details vary by core |
| PS2, GameCube, Wii | Often standalone emulators | Need a stronger PC; consult each project’s guide |
Step 3: Organise folders
Create a tidy structure before you load anything. A common layout is one folder for games with a subfolder per system, plus the BIOS folder that RetroArch uses. In RetroArch, open Settings, then Directory, and set the System Directory (where BIOS and system files go), the Save File and Save State directories, and the file browser directory pointing at your game collection. These menu names are given in the Libretro documentation.
Step 4: Add BIOS or firmware files when required
Many 8-bit and 16-bit systems need no extra files. Others, including the original PlayStation, Sega CD and Game Boy Advance in some cores, run better or only run with a BIOS dumped from hardware you own. Each core’s documentation lists the exact file names it expects and where to put them. Place them in the System Directory, matching the names exactly. If a game fails to start with a core, a missing or misnamed BIOS is a common cause.
Step 5: Load a game
From the main menu, choose Load Content, browse to your game file, and pick the core when asked if more than one supports it. Alternatively, use Import Content to scan a folder and build playlists with box art, so games appear as a tidy library. Playlist features and thumbnail downloads are found under the Online Updater, and the Libretro documentation explains each.
Step 6: Set up your controller
Libretro notes that XInput controllers, such as Xbox-style pads, typically work automatically. If yours does not, open Settings, then Input, then Input User 1 Binds, and choose Bind All, following the on-screen prompts. For other pads, such as classic-style USB controllers, bind each button once and save the layout as a remap file for a core or a game if needed. Menu names may differ slightly between RetroArch versions.
Step 7: Adjust video and audio
Retro games were made for CRT televisions, so raw pixels on a modern screen can look harsh or uneven. Useful options are listed below.
| Setting | What it does | Typical advice |
|---|---|---|
| Integer scaling | Scales the image by whole numbers for sharp pixels | Turn on for pixel-perfect output, accept black borders |
| Aspect ratio | Matches the original shape | Use the core’s reported ratio |
| Shaders | Adds scanline or CRT-style effects | Optional, start with light presets |
| V-Sync or adaptive sync | Reduces tearing | Enable to avoid screen tears |
| Run-ahead | Trims input lag for some cores | Uses extra CPU, so test with a light game first |
| Audio latency | Balances delay and crackling | Raise slightly if sound pops |
Shaders and run-ahead need extra processing power, so on a weak PC turn them off first if performance suffers.
Step 8: Save states and backups
RetroArch can store save states at any moment, plus normal in-game saves. Keep the save and state folders somewhere you back up, such as a cloud-synced folder, so a reinstall does not erase progress. Do not rely only on save states; also use the game’s own save feature where it exists.
Standalone emulators versus RetroArch
| Factor | RetroArch | Standalone emulators |
|---|---|---|
| Setup | One interface for many systems | Separate install and settings for each |
| Features | Shaders, rewind, run-ahead, playlists | Often deeper per-system options |
| Learning curve | Menu-heavy at first | Often simpler per system |
| Best for | Classic systems in one library | Demanding newer consoles |
Troubleshooting common problems
- Game will not load: confirm the core supports the file type and the game is not in a compressed archive the core cannot read.
- Black screen: a missing BIOS is a frequent cause; see the core’s page for filenames.
- Sound crackles: raise audio latency or switch the audio driver.
- Controller buttons wrong: rebind under Input, or remove a conflicting second controller.
- Stuttering: turn off shaders and run-ahead, use a lighter core, and update graphics drivers.
Frequently Asked Questions
Is emulation legal?
The emulator software is generally legal. Game files and BIOS files are copyrighted, so the legal question concerns where you get them. Use files you own and are permitted to copy, or free homebrew titles, and check your local law.
What is the best emulator for beginners?
RetroArch is a popular starting point because one program covers many classic systems. Some people prefer standalone programs for a single console because the menus are simpler. Either route works.
Do I need a powerful PC?
Not for 8-bit and 16-bit systems, which run on modest hardware. Newer 3D consoles need a stronger processor and graphics card, and requirements are listed by each emulator’s project.
What is a BIOS and why do I need one?
A BIOS is the console’s built-in firmware. Some emulators need it to start games or to improve compatibility. The documentation for each core lists which files it expects.
Can I use a modern controller?
Yes. Xbox-style pads typically work automatically, and other controllers can be mapped under the input settings. Wireless pads may add small delay compared with wired ones.
Where should I keep my game files?
In a dedicated folder with a subfolder for each system, then point RetroArch’s browser directory at it. Keep backups of your saves, and store BIOS files only in the System Directory.
FAQ
Is emulation legal?
What is the best emulator for beginners?
Do I need a powerful PC?
What is a BIOS and why do I need one?
Can I use a modern controller?
Where should I keep my game files?
More from Amazon
Programs that pair well with the guide above. Offers and eligibility are set by Amazon and may change.
Free shipping on eligible items, Prime Video and more. Eligible new members can start with a free trial.
Start a Prime free trialAd-free music streaming. Eligible new subscribers can start with a free trial.
Try Music Unlimited freeA Prime membership for ages 18-24 with a trial period. Eligibility is set by Amazon.
See Prime for Young AdultsAudiobooks and podcasts to listen to on the go. Eligible new members can start with a free trial.
Try Audible freeAs an Amazon Associate we earn from qualifying purchases.