
Key takeaways
- Launch RetroArch on your handheld.
- Navigate to Settings > Video > Scaling.
- Locate the Integer Scale toggle and switch it to On.
- Set the Aspect Ratio to Core Provided (typically 4:3 for classic home consoles).
What's inside
There is a distinct magic to retro gaming that modern high-definition screens often strip away. When you boot up a classic 8-bit or 16-bit title on a modern, ultra-crisp display, the raw, pixel-perfect scaling can look surprisingly harsh. Vintage games were designed to be played on cathode-ray tube (CRT) televisions. These bulky monitors naturally softened edges, blended colors, and cast subtle horizontal black lines—known as scanlines—across the screen. Without them, vintage sprites look blocky, jagged, and sterile.
However, setting up scanlines incorrectly on a modern emulation handheld can ruin the experience entirely. If scaled poorly, you will encounter distracting visual artifacts, such as uneven line widths, shimmering effects during horizontal scrolling (known as the “moiré effect”), and severe screen dimming that causes eye strain. Achieving that cozy, authentic arcade aesthetic requires a careful balance of scaling math, shader selection, and brightness calibration.
As an Amazon Associate we earn from qualifying purchases at no extra cost to you. Product prices and availability are accurate as of the date shown and are subject to change.

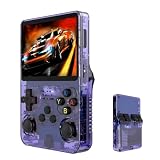
As we look at the landscape of retro gaming in 2026, emulation handhelds have reached a point where display resolutions are sharp enough to mimic classic CRTs with stunning accuracy. Whether you are using a high-end, 5.5-inch 1080p Android device or a compact, budget-friendly 3.5-inch IPS pocket console, this guide will walk you through setting up perfect scanlines for an authentic retro experience.
What You Need
Before diving into the software menus, ensure you have the right hardware and files prepared. Different handhelds handle scanlines differently based on their processor power and screen resolution.
| Item | Why You Need It | Optional? |
|---|---|---|
| Retro Emulation Handheld | The primary gaming device. High-end devices (like a 5.5-inch 1080p Android console in the $200–$250 range) run complex CRT shaders, while budget devices (3.5-inch IPS consoles in the $40–$60 range) rely on lightweight overlays. | No |
| RetroArch (or Standalone Emulator) | The software frontend that manages game cores, video scaling, shader files, and graphic overlays. | No |
| MicroSD Card (64GB to 256GB) | To store your operating system, emulator configurations, custom shader files, and retro game files. | No |
| USB-C Charging Cable & Power Source | To keep the handheld powered during setup. Advanced shaders can increase GPU load and power draw by 1 to 2 watts. | Yes (Recommended) |
Step-by-Step
This process focuses on RetroArch, the industry-standard frontend used on the vast majority of Linux and Android-based retro handhelds. Follow these steps to configure clean, evenly spaced scanlines.
Step 1: Enable Integer Scaling (Time: 3 Minutes)
The single biggest mistake users make is applying scanlines to an unevenly scaled screen. If a 240p game is stretched to fit a 480p, 720p, or 1080p screen without strict mathematical multiplication, some scanlines will look thicker than others. Integer scaling forces the emulator to scale the image only by whole numbers (e.g., 2x, 3x, 4x).
- Launch RetroArch on your handheld.
- Navigate to Settings > Video > Scaling.
- Locate the Integer Scale toggle and switch it to On.
- Set the Aspect Ratio to Core Provided (typically 4:3 for classic home consoles).
Step 2: Choose Between Shaders and Overlays (Time: 2 Minutes)
Now you must decide how your handheld will render the scanlines based on its hardware capabilities:
- Shaders (GPU-Intensive): Shaders are programs that run on your device’s graphics processor. They dynamically calculate light bleed, mask patterns, and curvature. This is ideal for powerful handhelds featuring processors like the Snapdragon 865 with an Adreno 650 GPU, which can easily handle heavy graphics pipelines.
- Overlays (CPU-Friendly): Overlays are simple, static transparent PNG images of black lines draped over your gameplay. This is the best method for budget-friendly handhelds running on low-power chipsets, as it uses virtually zero processing power.
Step 3: Apply Your Scanline Filter (Time: 5 Minutes)
Depending on your choice in Step 2, follow the corresponding path below:
Option A: Applying Shaders (For High-End Handhelds)
- Load a game and open the RetroArch Quick Menu (usually by pressing Select + Start or the dedicated menu button).
- Scroll down and select Shaders. Toggle Video Shaders to On.
- Select Load Preset.
- Navigate to the shaders_glsl or shaders_vulcan folder.
- For a clean, lightweight scanline look, open the crt folder and select crt-pi.glslp or crt-easymode.glslp. For a highly detailed, curved arcade monitor look on a high-resolution screen, choose crt-geom.glslp.
Option B: Applying Overlays (For Budget Handhelds)
- Open the RetroArch Quick Menu while in a game.
- Scroll down and select On-Screen Overlay. Toggle Display Overlay to On.
- Select Overlay Preset and navigate to the effects or scanlines folder.
- Select a preset that matches your screen resolution (e.g., scanline1x.cfg or a 240p grid overlay).
Step 4: Adjust Opacity and Brightness (Time: 3 Minutes)
Because scanlines introduce black lines across your display, they naturally reduce the overall brightness of your screen. You must compensate for this loss of light.
- In the Shaders or Overlay menu, look for Shader Parameters or Overlay Opacity.
- Lower the scanline opacity to a setting between 0.30 and 0.50 (30% to 50%). Anything higher will look too dark; anything lower will be invisible.
- Increase your handheld’s physical screen brightness by 10% to 15% to offset the black lines and bring back the vibrant colors of the game art.
Step 5: Save Your Settings globally (Time: 2 Minutes)
To avoid repeating this setup every time you boot up a game, you must save your configuration.
- In the Quick Menu, return to the Shaders (or Overlays) directory.
- Select Save.
- Choose Save Core Preset to apply these scanlines to every game running on that specific console emulator (e.g., all SNES games), or Save Global Preset to apply it to every game on the system.
Mistakes to Avoid
- Stretching the Screen to 16:9: Forcing a classic 4:3 game to fill a modern widescreen panel distorts the pixel grid. Your scanlines will look stretched, blurry, and uneven across the horizontal plane. Always keep your aspect ratio at 4:3 or 8:7 depending on the core.
- Overloading Budget Hardware: Running a multi-pass CRT shader (like CRT-Royale) on a budget $50 handheld will cause the framerate to drop from a smooth 60 frames per second to a stuttering 30 frames per second. If you hear audio crackling, immediately switch to a simpler overlay or a lightweight shader like crt-pi.
- Ignoring Screen Resolution Math: Applying a 1080p scanline overlay to a low-resolution 640×480 screen will create terrible visual artifacts. Always match the overlay preset to your physical screen resolution.
- Over-Saturating Scanline Thickness: Setting the black lines to 100% opacity makes the screen look like you are viewing the game through a security grate. Keep the lines soft and semi-transparent.
How Often to Calibrate Scanlines
Unlike physical hardware, digital scanline configurations do not degrade over time. However, you should revisit your settings whenever you update your handheld’s custom firmware, perform a major RetroArch update, or connect your handheld to an external display. If you dock your handheld to output a 1080p signal to a television, you will need to swap your handheld-optimized shader for a higher-resolution TV shader preset to maintain the correct scale.
When to Seek Help or Upgrade
If you have configured integer scaling and applied lightweight shaders, but your handheld still suffers from severe screen tearing, sluggish gameplay, or muddy visuals, your hardware may be hitting its limits.
For budget handhelds under $50, you may need to visit online community forums or GitHub repositories to download custom, community-optimized configuration files tailored specifically to your device’s low-power screen. If software tweaks still do not resolve the performance drop, it may be time to upgrade to a mid-tier or premium handheld with a faster processor and a higher-resolution screen capable of rendering advanced real-time CRT filters without breaking a sweat.
FAQ
Why do my scanlines look uneven or wavy when the camera scrolls?
This is called shimmering or the moiré effect. It happens when your game’s virtual resolution does not line up perfectly with your handheld’s physical screen pixels. To fix this, open your emulator’s video settings and turn on Integer Scaling. This forces the screen to scale in perfect mathematical steps, ensuring every scanline is exactly the same thickness.
Do scanlines drain my handheld’s battery faster?
Yes, but only if you are using advanced GPU shaders. Complex shaders require your graphics processor to work harder, which can increase power draw and shorten your battery life by roughly 10% to 15%. If battery life is your top priority, switch from a GPU shader to a static, lightweight transparent Overlay instead.
Can I get scanlines on standalone emulators like DuckStation or PPSSPP?
Yes. While this guide focuses on RetroArch, most standalone emulators have their own built-in post-processing effects. Look under the emulator’s “Video” or “Graphics” settings menu for options labeled “Post-Processing Shaders,” “Scanlines,” or “CRT Filters.”
Will enabling scanlines cause screen burn-in on my OLED handheld?
No. Because you are playing dynamic, moving video games, static scanline filters will not cause burn-in on modern OLED panels. To be completely safe, keep your screen brightness at a moderate level and avoid leaving a game paused on a static screen with high-contrast overlays for hours at a time.


