Key takeaways
- Standoffs and motherboard: Confirm the case standoffs match your board, then screw the board down gently.
- Power supply: Mount it, ideally with the fan facing a vent, and route the main cables first.
- Storage and GPU: Fit M.2 SSDs, then seat the graphics card in the top PCIe slot until it clicks and screw it to the case.
What's inside
Building your own gaming PC is one of the most rewarding projects in the hobby: you pick every part, you understand exactly what you own, and you save money you’d otherwise hand to a system integrator. It can feel intimidating the first time, but modern components are designed to fit together in only one correct way, and the process is closer to careful assembly than engineering.
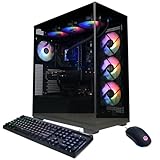
This guide walks through the build from parts selection to first boot, so you know what each component does and the order to install it. If you’d rather skip assembly entirely, capable prebuilt systems like the KOTIN RTX 5070 desktop or the Alienware Aurora make useful benchmarks for the performance and price a self-build should aim to beat.
As an Amazon Associate we earn from qualifying purchases at no extra cost to you.




⚡ Save on Your Next PC — Amazon Prime
Prime members get fast free shipping on the systems above, plus early access to Prime Day & Black Friday PC deals. New members get a 30-day free trial.
Watch: How to Build a Gaming PC (2026 Beginner’s Guide) — Video Review
Plan Your Parts Around a Target
Every good build starts with a clear goal: the resolution and frame rate you want to play at. That target dictates your GPU, which in turn sets the sensible tier for your CPU, power supply, and cooling. Decide on 1080p high-refresh, 1440p, or 4K first, then choose a graphics card to match and build the rest of the system to support it without bottlenecking.
Assemble the Core Outside the Case
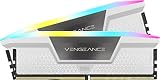
Seasoned builders install the CPU, cooler, and RAM onto the motherboard before it goes in the case, because there’s far more room to work on an open surface. Drop the CPU in by aligning its corner triangle, seat the RAM until both clips click, and mount the cooler evenly. Testing this core on the bench before final assembly saves a lot of grief if something needs reseating.
Install Into the Case in Order
- Standoffs and motherboard: Confirm the case standoffs match your board, then screw the board down gently.
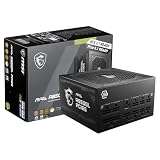
- Power supply: Mount it, ideally with the fan facing a vent, and route the main cables first.
- Storage and GPU: Fit M.2 SSDs, then seat the graphics card in the top PCIe slot until it clicks and screw it to the case.
Cable Management and Airflow
Neat cabling isn’t just cosmetic; it keeps air moving freely for lower temperatures. Route cables behind the motherboard tray, use the case’s tie-down points, and keep the main chamber clear. Set your fans for front and bottom intake with rear and top exhaust so cool air flows across the components and hot air leaves efficiently.
First Boot and BIOS
Before closing the case, do a test boot with just the essentials connected. Enter the BIOS to confirm the CPU, RAM, and drives are all detected, then enable your memory’s XMP/EXPO profile so it runs at full rated speed rather than a slow default. Once everything posts correctly, install your operating system and the latest GPU drivers, and you’re ready to game.
Tips
- Build the CPU, cooler, and RAM onto the motherboard outside the case for easier access.
- Enable XMP or EXPO in the BIOS or your fast RAM will silently run at slow default speeds.
- Do a bench test boot before full assembly so troubleshooting doesn’t mean tearing the build apart.
- Keep the motherboard box and manual handy; the manual maps every header and connector.
Frequently Asked Questions
Is building a PC cheaper than buying prebuilt?
Usually, yes, especially at the mid and high end, and you get exactly the parts you want. Prebuilts like the KOTIN or Alienware systems can be competitive during sales, so compare against a self-build’s total before deciding.
How long does a first build take?
Plan for three to four hours your first time, including cable management and setup. Experienced builders finish in about an hour, but there’s no prize for rushing your first one.
What’s the hardest part of building a PC?
Most beginners find cable management and the initial CPU install the most nerve-wracking, but both are straightforward with care. The genuinely hard part is usually just resisting the urge to force a component that should slide in gently.
Do I need to apply thermal paste myself?
Often not, since many coolers ship with paste pre-applied. If yours doesn’t, a single pea-sized dot in the center of the CPU spreads evenly under cooler pressure, which is all you need.
Conclusion
Building a gaming PC is methodical, not mysterious: set a performance target, choose parts that balance around your GPU, assemble in a sensible order, and verify everything in the BIOS before your first game. Take your time, follow the motherboard manual, and you’ll end up with a machine you understand top to bottom, one that out-values comparable prebuilt systems for years to come.